
Decapower Curated information for Professionals, Hobbyists & Educators.
Stay up to date with the latest information on new products technology,innovations and more from Welding Machine Industry.


Welding machine troubleshooting common problems and solutions
General Principles for Troubleshooting Welding Equipment
Before diving into the exact troubles, we need to set up a group of basic fix rules. By sticking to these steps, you can methodically and safely find the issue:
Safety First: Before any check or upkeep, make sure that the welding equipment has been disconnected from the power supply. This stands as the top step to avoid shocks or unintended starts.
Systematic Inspection: Begin with the easiest and clearest checks, then move on step by step. For instance, first see if the power cable is plugged in tightly. After that, look at the tricky parts inside the unit.
Basic Inspection: Verify that the power source works fine, all wires connect firmly, the grounding clamps hold steady, and the supplies (such as welding wire, welding rods, gas cylinders) sit right and have enough left.
Refer to the User Manual: Your gear guide serves as a key tool for fixing issues. It often holds full fix tips, wiring layouts, and part details. These can aid you in grasping the unit’s function and care needs precisely.
Common Issues with Welding Equipment and Their Solutions
Now, let’s examine some usual troubles with welding gear and figure out how to spot and fix them:
A. Instability of Arc or Failure to Spark
Symptoms: The unit’s power light shines, but the arc won’t start; or the arc breaks off and stays unsteady.
Possible Causes:
Poor Grounding: The grounding clamps don’t attach well to a fresh, exposed metal piece, or the grounding cable links are slack.
- Incorrect Parameter Settings: The current or voltage choices are wrong and fail to suit the welding stuff kind and the piece’s depth.
- Welding Consumables Issues: The welding rod feels wet, the welding wire blocks up, the welding nozzle shows wear or lacks good touch.
- Insufficient Power Supply: The power line’s voltage drops too low or the load limit falls short.
Solution:
- Check Grounding: Make certain the grounding clamps fix tightly to a fresh, exposed metal piece. Also, inspect if the grounding cable ends connect snugly.
- Adjust Parameters: Based on the welding stuff kind, width, and piece depth, tweak the current and voltage following the gear guide or past know-how.
- Check Consumables: Swap out wet welding rods, wipe or change the welding nozzle/dielectric nozzle, and confirm the welding wire moves out smoothly.
- Check Power Supply: Verify the power source voltage stays steady, and that the power line width and outlet fit the gear’s needs.
B. Excessive Weld Seam Pores
- Symptoms: Many tiny gaps or tunnel-shaped flaws appear on the weld surface or within it.
Possible Causes:
- Insufficient Gas Protection: Low gas tank stock, too tiny gas stream, the welding tool too distant from the piece, high wind pace, or wrong gas blend mix.
- Surface Contamination of the Workpiece: The piece surface holds dirt like oil, rust, dampness, or coating.
- Welding Rod or Welding Wire Moisture: Inside buildup of steam.
- Excessive Welding Speed: The melt pool shifts too quick before full gas shield hardening.
Solution:
- Optimize Gas Protection: Inspect the gas tank stock and pressure dial, set a fitting gas stream (often 10-15L/min), keep the right gap between the welding tool and the piece, and skip welding in heavy wind spots.
- Clean the Workpiece: Fully clear oil, rust, dampness, and coating from the piece surface prior to welding.
- Replace Consumables: Pick dry welding rods or welding wires.
- Adjust Welding Speed: Ease the welding pace a bit to give the melt pool enough time to harden under gas shield.
C. Insufficient Penetration or Burn-through
Symptoms:
Insufficient Penetration: The weld sits on the piece surface and doesn’t go through completely.
Burn-through: The melt pool cuts through the piece and makes a gap.
Possible Causes:
- Insufficient Penetration: Low current/voltage, quick welding pace, wrong welding tool slant, and faulty groove setup.
- Burn-through: High current/voltage, slow welding pace, slim piece, and too long welding tool pause.
Solutions:
- For Insufficient Penetration: Boost the current/voltage a tad, slow the welding pace, tweak the welding tool slant, and confirm the groove gets set right.
- For Burn-through: Cut the current/voltage a bit, speed up the welding pace, or apply pulse welding or spot welding methods when handling thin stuff.
D. Severe Spatter
- Symptoms: While welding, lots of melted metal drops scatter onto the piece or near the welding tool.
Possible Causes:
- Incorrect Parameter Settings: Too much or too little voltage, mismatched wire push speed.
- Gas Protection Issues: Wrong pick of shield gas or shaky gas stream.
- Workpiece Contamination: The surface shows rust or oil cover.
- Excessive Wire Extension Length.
Solution:
- Optimize Parameters: Tweak the voltage and wire push speed, and aim to hit the best arc steady spot.
- Check Gas: Confirm the right shield gas gets used and keep a steady gas stream.
- Clean the Workpiece: Wipe the piece surface fully before welding.
- Adjust Wire Extension Length: Hold a fitting wire stick-out length (often 10-15 millimeters).
Decapower: Provide you with outstanding welding solutions
Grasping and fixing the above usual troubles can greatly boost your welding time. Yet, picking a smartly made and dependable welding gear can cut many needless issues from the start. Decapower aims to give users top fixes and works hard to bring new tech and answers into the welding field. We truly hear customers’ hurdles and keep bettering items, and help to tackle these hurdles well.
Our item range covers a broad set of welding and cutting demands and is known for its top function and fix-focused build.
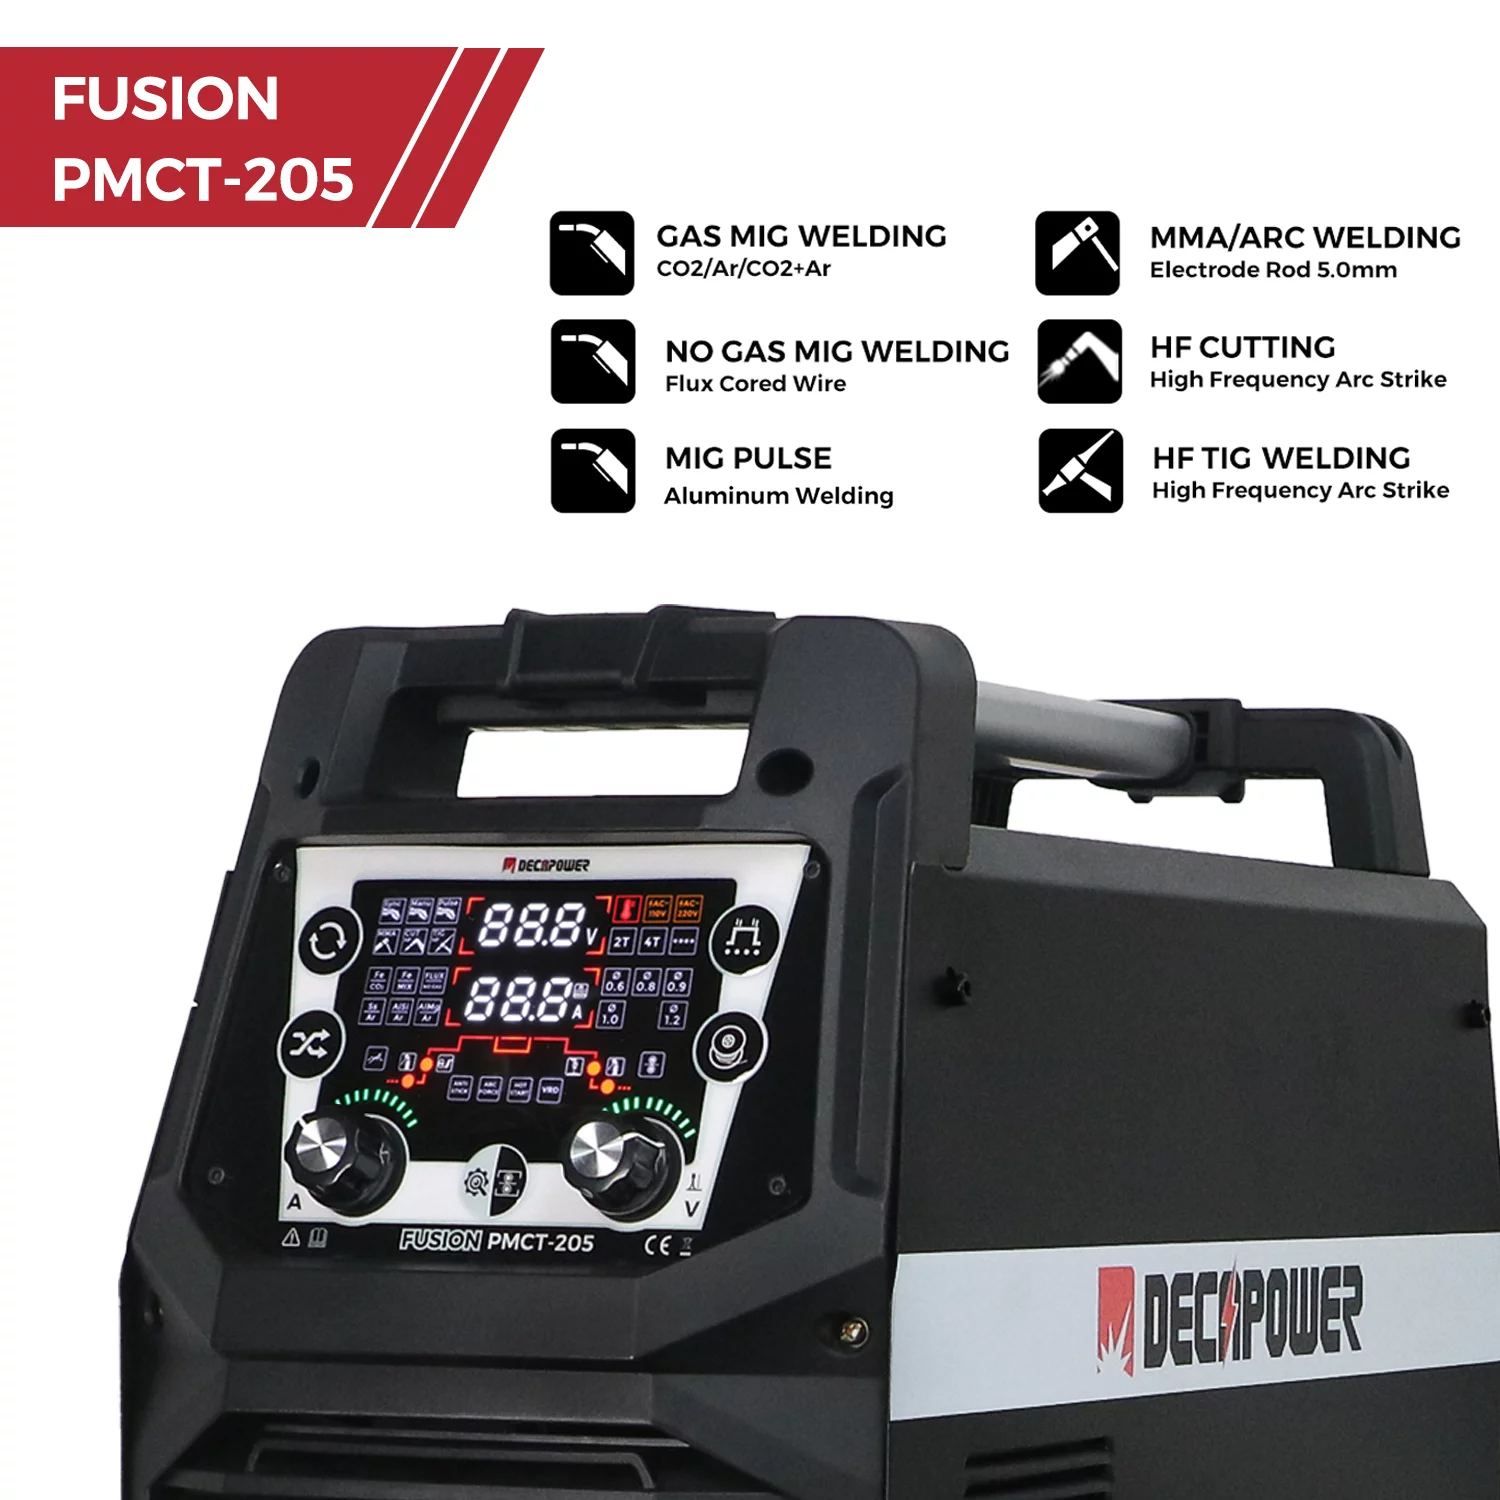
Multi-functional integration, simplifying complex work: For users wanting speed and bend, Decapower’s FUSION MULTI PROCESS series, stands as a great pick. This multi-task welder blends gas shield welding, no gas shield welding, hand arc welding, and direct current up-pulsed TIG welding (Lift TIG (DC) welding) four welding ways. It can manage the welding of various materials like steel, stainless steel, aluminum, and copper with ease. This shows you don’t need to buy many units; one Decapower FUSION PMCT-205 Multi-process 6-in-1 Welder & Cutter can handle most of your needs from daily fixes to expert tasks. Its clear LCD screen and “Syn” (team) function make setting choices simple and easy, even new folks can start fast and get great welding outcomes.
Conclusion
Learning the fix skills of welding gear is a must-have skill for every welder, since it can build your trust when facing hurdles. But, choosing a high-standard, multi-use, and easy-to-handle unit like Decapower can basically lower the chance of troubles and make your welding task more productive. We always work to bring fresh, fair costs, and top item shows to world users.
Whether it’s regular upkeep or tricky tasks, Decapower will serve as your steady mate. Check our items and feel how advanced tech can lift your welding time. Together, let’s face the welding hurdles of tomorrow!
FAQ
Q: How often should I replace plasma cutter consumables?
A: Plasma cutter consumables like electrodes and nozzles should be replaced when you notice a degradation in cut quality, difficulty in starting the arc, or visible wear and tear. The exact frequency depends on usage intensity and material cut。
Q: What is the main benefit of a multi-process welder?
A: The main benefit of a multi-process welder, like the Decapower XTRAMIG 200 SYN, is its versatility. It combines multiple welding processes into one machine, allowing you to work with different materials and applications without needing separate equipment.
Q: How do I prevent spatter in MIG welding?
A: To prevent spatter in MIG welding, ensure your voltage and wire feed speed settings are optimized, use the correct shielding gas, keep your base metal clean, and maintain a proper wire stick-out length。